Equipment overview
1.1Equipment features
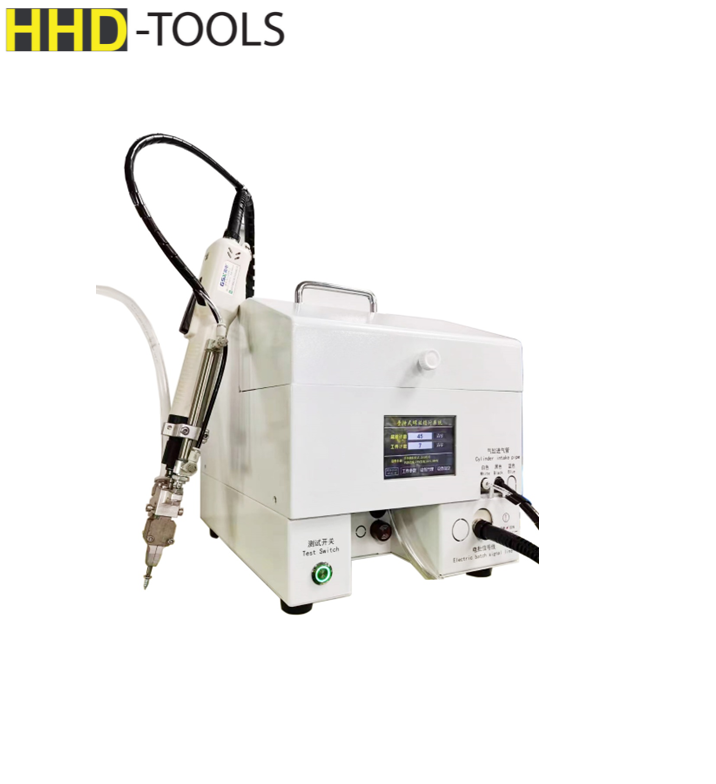
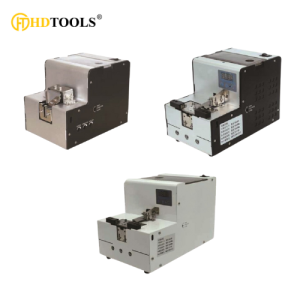
This equipment is specially designed to replace the tedious action of traditional manual screw removal. Manual work only needs to pack the qualified finished product into bagged screws. Just put an appropriate amount into the feeding port of the machine. When the equipment is powered on and ventilated, it can be automatically arranged and blown out in sequence. It greatly improves work efficiency and reduces manual labor intensity.
The specific features of the equipment are as follows:
★ The equipment adopts LCD screen control system, humanized screen design, easy operation, and has password lock function.
★ All parts and accessories used in the equipment adopt national standards, are made with precision, are safe and stable, and have low noise.
★ The equipment is simple to operate and employees can quickly become familiar with and use it within ten minutes, which greatly improves production efficiency and reduces labor intensity.
★ The equipment operates smoothly. Except for abnormal screws, the feeder will not have screws stuck, and the noise is low.
★ The screws are automatically blown under the hand-held electric batch chuck or machine electric batch chuck through compressed air to increase the speed of the screws.
Fast, the fastest can reach 0. 8 s per screw, and there is no inversion or material jamming. The equipment operates stably and reliably, and can operate continuously for a long time.
★ The screw conveyor has a torque automatic conveyor mode and a manual button conveyor mode.
★ The screws do not need to be transferred to the bit by human hands, thus avoiding product quality hazards caused by sweaty hands touching the surface of the screws.
★ It has a variety of fault alarm and counting functions. When there is a shortage of material or abnormal material jamming, the equipment automatically
When entering the alarm mode, the machine will trigger the alarm light and alarm sound to give a warning. At the same time, the device comes with a single
Product and screw total counting function for easy use.
★ Suitable for deep hole locking, hole depth below 15 0MM can be locked.
1.2 Equipment usage
This equipment is mainly used for automatic locking screw-related work stations, such as: power strip production line, electric toy production line, solenoid valve production line, computer, LED light production line, etc. This equipment is suitable for all assembly sites that require the installation of screw-related products.
1.3 Scope of application and screw requirements
- Screw size : M 1.0 ~ 5.0
- Screw requirements: The total length of the screw (including the nut) L divided by the diameter of the nut D must be greater than 1.3, that is, L/D>1.3.
- Screw head patterns such as: straight, cross, triangle, plum blossom, hexagon socket, H head, etc.
- Screw surface treatment methods such as: electro – nickel, black pot, colored zinc plating, white zinc plating, copper plating, etc.
- Screw materials such as: iron , copper, stainless steel, etc.
The materials of locking screw products include: plastic, iron, aluminum, etc.
instruction manual:
- Screws of different specifications need to be replaced with corresponding accessories.
- The hand-held push-pull type is only suitable for iron screws.
1.4 Technical parameters
| serial number | project name | Parameters and specifications |
| 1 | Discharging mode | one out one |
| 2 | Operating Voltage | A C 220V/50HZ |
| 3 | working pressure | 0.5 —0.7MPa |
| 4 | rated power | 300W |
| 5 | Conveying efficiency | 0.5-1.0 seconds / screw |
| 6 | Conveying distance | Standard configuration 1.8 meters |
| 7 | Push and pull stroke | 1 0-150 MM ( customized according to customer products) |
| 8 | Feeder volume | M 3.0*8/2000PCS |
| 9 | Dimensions | 415*245*300 |
| 1 0 | Equipment net weight | 13.5KG |
| 1 1 | Parts List | Pinwei power cord, 1 batch rod, 2 feeding tubes, 1 spring, 3 # 1 hex wrench |
Installation Notes
2.1 Disassembly and assembly inspection
- Check whether the equipment has been dropped or damaged during transportation;
- Check whether the equipment is upside down;
- Check whether the specifications of the equipment are consistent with the order;
- Check whether the packing list is consistent with the actual product.
If the above phenomenon occurs, please do not use the equipment and contact the dealer or our company in time.
2.2 Safety regulations
- Before using this equipment, please read the instructions carefully and understand the relevant safety signs and operating procedures to ensure safety.
- Check whether the power supply voltage is consistent with the provided specifications. The power supply must be well grounded.
- Non-professionals are not allowed to open the door or cover of the equipment to prevent electric shock.
- The panel display of this device cannot be scratched with sharp objects.
- Users are not allowed to change the wiring or parts of this equipment by themselves, otherwise the company’s quality guarantee will be invalid, and we will not be responsible for the resulting consequences.
2.3 Installation requirements
- This equipment should be placed on a level and stable work surface. If it is uneven, it should be adjusted first.
- The ambient temperature used by this equipment is 25 ± 10°C , and the relative humidity is 50 ± 30%RH .
- There should be a distance of more than 50 centimeters between this equipment and walls and any other machines .
- This equipment should be kept away from heat and corrosion sources.
- This equipment is connected to a 220V/50Hz ± 10% power supply with good grounding when working .
- This machine needs to be connected to a pure gas source of 0.5~0.7MPa .
2.4 Install
- After the equipment arrives, unpack and inspect it to see if it is damaged or injured and whether the accessories are complete ;
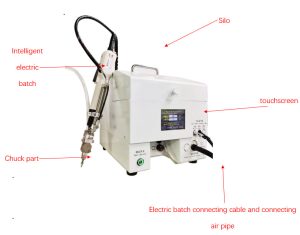
- Insert the electrical signal cable into the corresponding port on the device. Note that the port is fool-proof and must be aligned with the reference before insertion ;
- Insert the 4*2.5 black and white air pipes on the electric batch machine into the corresponding black and white air pipe connectors on the equipment ;
- Plug the other end of the electric batch signal cable into the corresponding port on the electric batch, the same as step 2 above ;
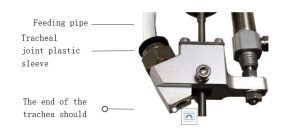
- Insert the feeding pipe into the corresponding air pipe joint on the clamp fixing block, as shown in the figure below .
Note:
- 1. The trachea must be inserted in place (the end of the trachea must be flush with the other end of the clamp fixing block), otherwise the screws will be jammed;
- 2. When pulling out the trachea, be sure to press down the plastic sleeve of the trachea connector before pulling out the trachea;
- Take the air pipe from the accessory and insert it into the air pipe joint corresponding to the air source processing component at the back of the device (there is a pressure gauge behind the device);
- Take the 220V power cord from the accessories and plug it into the power holder at the back of the device;
- Check whether the power supply and air source connected to the equipment are consistent with the equipment requirements. Remember;
- Open the gas source manual slide valve, turn on the power switch, and check whether the equipment is operating normally;

Reviews
There are no reviews yet.